Moderne dusche 100x100 im hellen Badezimmer, das stilvolle Design und Komfort ausstrahlt.

Stilvolle dusche 100×100: Ihr Weg zu einem modernen Badezimmer

1. Einführung in die dusche 100×100

1.1 Was ist eine dusche 100×100?

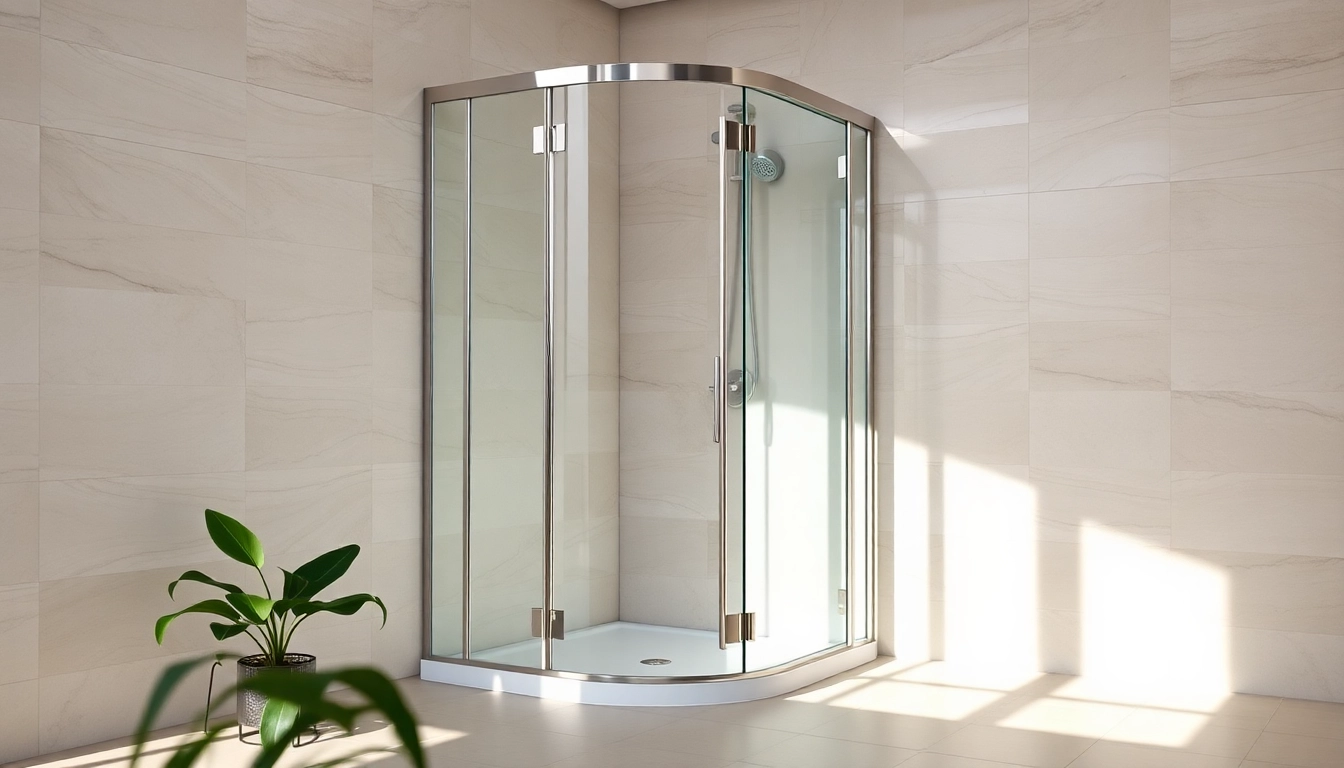
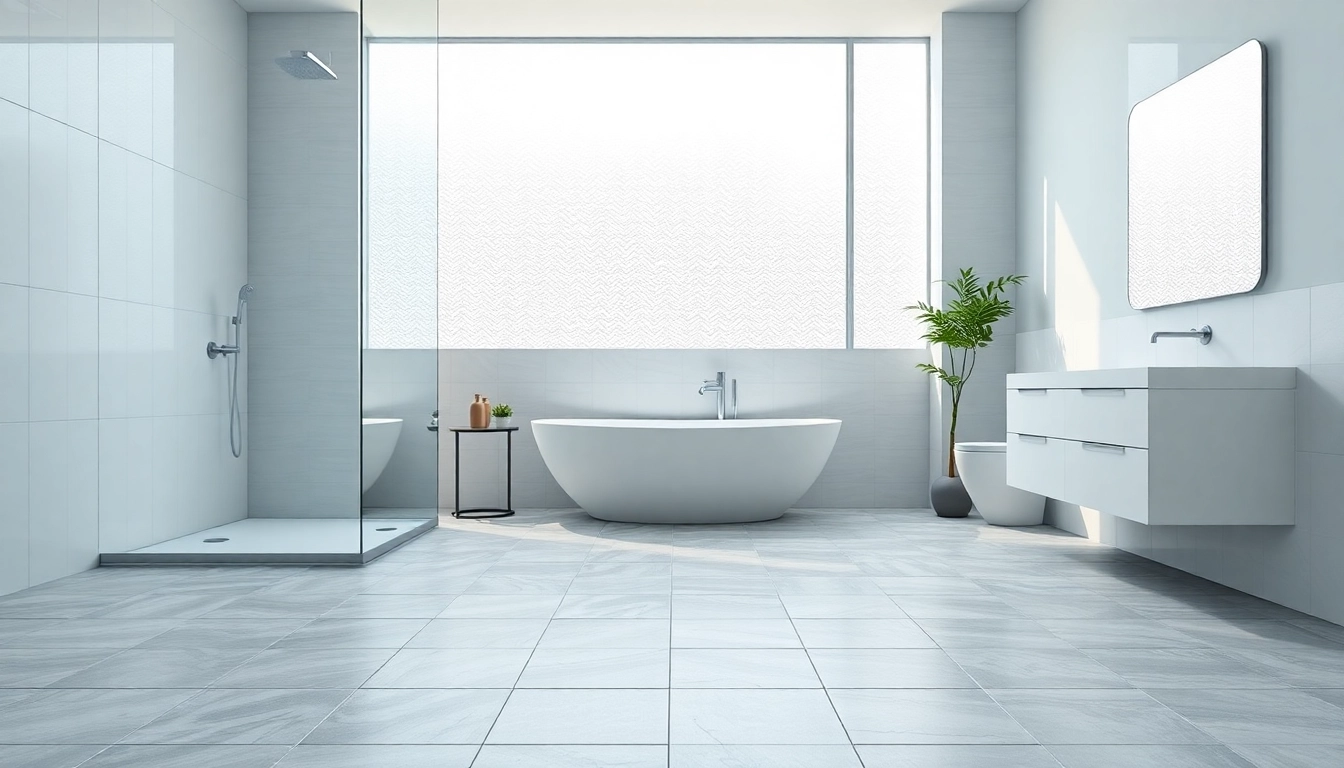
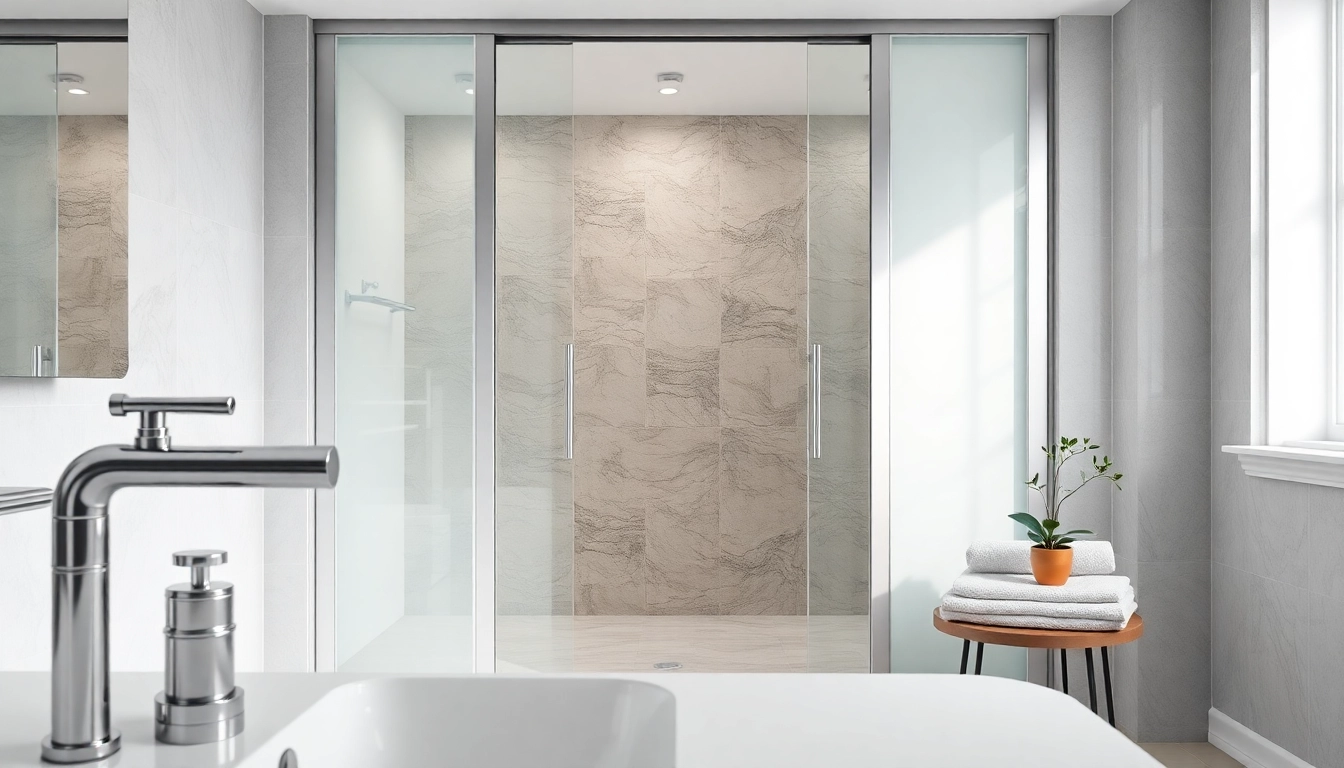
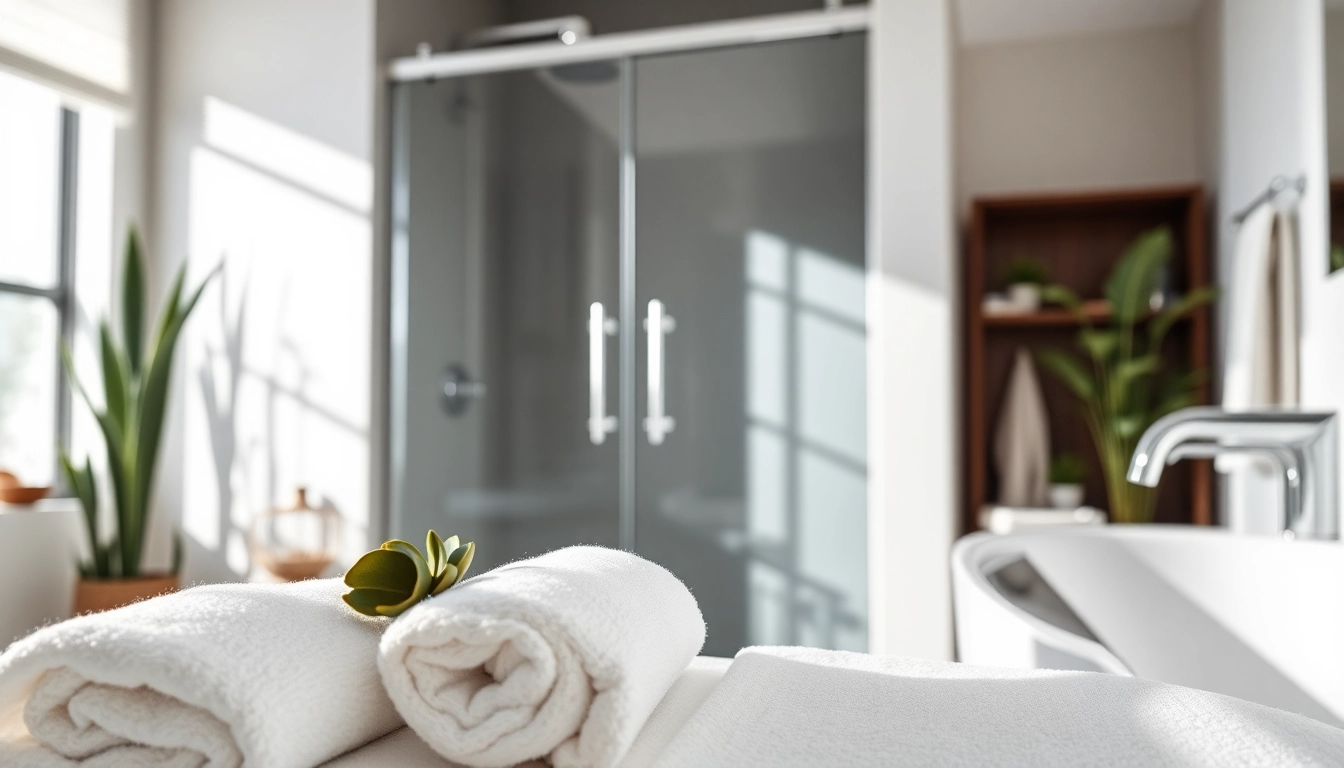
Die dusche 100×100 ist ein vielseitiges Element, das in modernen Badezimmern eine Schlüsselrolle spielt. Mit ihren kompakten Maßen von 100 cm x 100 cm eignet sie sich perfekt für kleinere Badezimmer, bringt aber dennoch eine elementare Funktionalität und einen Hauch von Eleganz mit sich. Die dusche 100×100 bietet eine komfortable Möglichkeit, den Alltag zu verkürzen und das Badezimmer in ein persönliches Wellness-Paradies zu verwandeln. Die Varianten reichen von einfachen Duschkabinen bis hin zu luxuriösen, walk-in Lösungen.

1.2 Vorteile der Wahl einer dusche 100×100

  • Komfortable Größe: Die dusche 100×100 bietet ausreichend Platz, ohne zu viel Raum einzunehmen.
  • Vielseitigkeit: Sie ist in vielen Designs und Stilen erhältlich, sodass sie sich leicht in jedes Badezimmer integrieren lässt.
  • Benutzerfreundlichkeit: Durch die praktische Größe ist die dusche 100×100 sowohl für Familien als auch für Singles ideal.
  • Einfache Reinigung: Mit der richtigen Materialwahl ist die Pflege der dusche 100×100 unkompliziert.
  • Wertsteigerung: Eine ansprechend gestaltete dusche 100×100 kann den Wert Ihrer Immobilie erhöhen.

1.3 Beliebte Designs und Stile

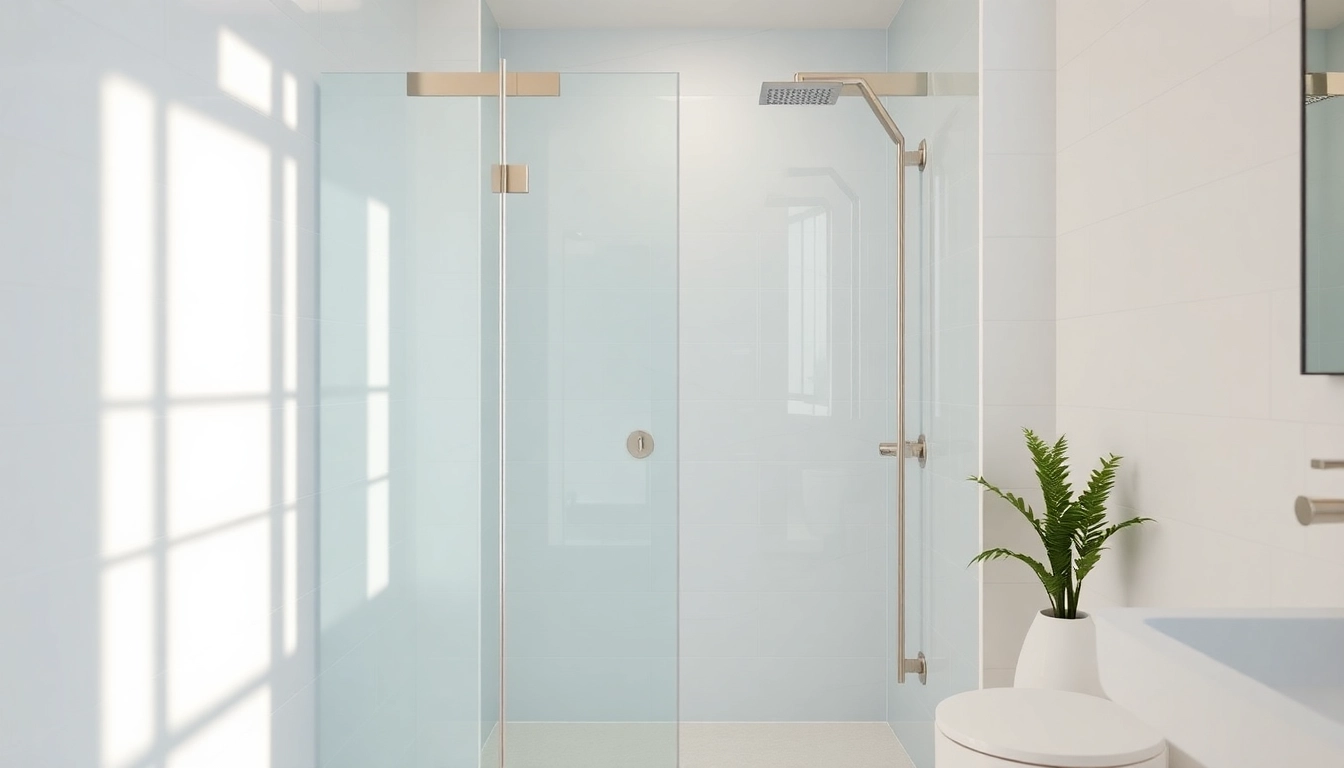
Die Palette der Designs für die dusche 100×100 reicht von modern-minimalistisch, über trendig und elegant bis hin zu klassisch und zeitlos. Glasduschkabinen sind besonders beliebt, da sie den Raum optisch vergrößern und für eine helle, freundliche Atmosphäre sorgen. Auch die Verwendung von Fliesen in verschiedenen Farben und Mustern kann der dusche 100×100 eine persönliche Note verleihen. Zu den beliebtesten Stilen gehören:

  • Skandinavischer Stil: Helle Holzoberflächen und klare Linien sorgen für einen frischen, minimalistischen Look.
  • Industrieller Stil: Metallelemente und dunkle Farbtöne geben der dusche 100×100 ein modernes, urbanes Flair.
  • Luxuriöser Stil: Hochwertige Materialien und ausgefallene Accessoires verwandeln die dusche 100×100 in einen Bereich des Wohlbefindens.

2. Planung und Maßnahmen für die dusche 100×100

2.1 Raumvorbereitung und Maße

Bevor Sie mit der Installation Ihrer neuen dusche 100×100 beginnen, ist eine sorgfältige Planung entscheidend. Messen Sie den verfügbaren Raum genau aus. Berücksichtigen Sie dabei bereits vorhandene Sanitäranschlüsse und den Zugang zu Stromquellen für zusätzliche Funktionen wie Beleuchtung oder Heizungen. Achten Sie darauf, mindestens 2 bis 3 cm Abstand zu Wänden und anderen Badezimmermöbeln zu lassen.

2.2 Benötigte Materialien und Werkzeuge

Um eine dusche 100×100 zu installieren, benötigen Sie eine Vielzahl von Materialien und Werkzeugen. Zu den grundlegenden Materialien gehören:

  • Duschkabine oder -wanne
  • Unterkonstruktionen aus Edelstahl oder Kunststoff
  • Entwässerungssystem
  • Dichtmittel und Silikon
  • Fliesen für den Badezimmerboden

Benötigte Werkzeuge sind:

  • Bohrmaschine
  • Schraubenzieher
  • Wasserwaage
  • Messwerkzeuge
  • Dichtschneider

2.3 Schritt-für-Schritt-Anleitung zur Installation

Die Installation einer dusche 100×100 erfolgt in mehreren Schritten:

  1. Raumvorbereitung: Entfernen Sie alle alten Einrichtungen und Fliesen, reinigen Sie den Bereich gründlich und gewährleisten Sie, dass der Boden eben ist.
  2. Installation des Abflusses: Setzen Sie das Abflussrohr so ein, dass es die richtige Höhe erreicht und wasserdicht ist.
  3. Aufbau der Unterkonstruktion: Stellen Sie sicher, dass diese stabil ist und den Anforderungen der Duschkabine entspricht.
  4. Montage der dusche 100×100: Befolgen Sie die Anweisungen des Herstellers und montieren Sie die Wände und Türen fachgerecht.
  5. Dichtungsarbeiten: Tragen Sie Silikon auf, um die Dichtheit der Fugen zu gewährleisten.
  6. Endarbeiten: Fliesen, verkleiden Sie den Bereich um die dusche 100×100 und nehmen Sie abschließend die Installation der Armaturen vor.

3. Pflege und Wartung der dusche 100×100

3.1 Reinigungstipps für langanhaltende Schönheit

Um die dusche 100×100 über die Jahre schön zu erhalten, ist regelmäßige Pflege unerlässlich. Verwenden Sie milde Reinigungsmittel und weiche Schwämme, um Kratzer auf der Oberfläche zu vermeiden. Einmal pro Woche gründlich reinigen, insbesondere die Fugen und den Bodenbereichen, um Kalkablagerungen und Schimmel zu verhindern. Essig oder Zitronensaft sind natürliche Alternativen zur Entfernung von Kalkflecken.

3.2 Häufige Probleme und Lösungen

Bei der Nutzung einer dusche 100×100 können einige Probleme auftreten. Zu den häufigsten gehören:

  • Undichte Dichtungen: Prüfen Sie regelmäßig die Dichtungen und tauschen Sie sie bei Anzeichen von Verschleiß aus.
  • Kalkablagerungen: Verwenden Sie spezielle Entkalker, um diese zu verhindern. Vermeiden Sie die Verwendung von aggressiven Chemikalien.
  • Bodenrutschigkeit: Eine rutschfeste Beschichtung des Bodens kann Fallschäden vermeiden.

3.3 Austausch von Dichtungen und Zubehör

Die Wartung der dusche 100×100 umfasst auch den Austausch von Zubehörteilen. Dichtungen sollten etwa alle ein bis zwei Jahre ersetzt werden, um Wasserschäden zu vermeiden. Halten Sie alle anderen Armaturen ebenfalls im Blick, insbesondere Duschköpfe und Mischbatterien. Ein schneller Austausch kann wesentlich zur Langlebigkeit der dusche 100×100 beitragen.

4. Trends und Innovationen in dusche 100×100 Designs

4.1 Smarte Funktionen für jede dusche 100×100

Smarte Technologien haben in den letzten Jahren auch in Badezimmern Einzug gehalten. Temperatur- und Wassermengenkontrollduschen, die über eine App gesteuert werden können, bieten für die dusche 100×100 zusätzlichen Komfort. Lichttherapie und Aromatherapie sind perfekt, um den Duschbereich in eine Wohlfühloase zu verwandeln.

4.2 Umweltschonende Optionen und Materialien

Immer mehr Käufer legen Wert auf nachhaltige Materialien und Technologien. Duschen mit Wasserspareffekten sowie nachhaltigen Materialien wie Recyclingglas werden zunehmend populär. Mit einer umweltfreundlichen dusche 100×100 tragen Sie nicht nur zu einem besseren ökologischen Fußabdruck bei, sondern sparen zudem Wasser und Energiekosten.

4.3 Anpassen Ihrer dusche 100×100 an persönliche Vorlieben

Eine dusche 100×100 lässt sich hervorragend an persönliche Vorlieben anpassen. Wählen Sie aus zahlreichen Materialien, Farben und Designs, um Ihrer individuellen Vorstellung gerecht zu werden. Von speziellen Duschköpfen bis hin zu ergonomischen Duschabtrennungen – die Möglichkeiten sind nahezu unbegrenzt. Berücksichtigen Sie dabei Ihre persönliche Ästhetik und das vorhandene Badezimmer-Design.

5. Häufig gestellte Fragen zur dusche 100×100

5.1 Wie finde ich die richtige Größe für meine dusche 100×100?

Überlegen Sie den verfügbaren Platz, die Wandgestaltung und Ihre Bedürfnisse. Eine präzise Vermessung ist unerlässlich.

5.2 Wie viel kostet eine dusche 100×100 im Durchschnitt?

Die Preise variieren je nach Material und Design, beginnen aber typischerweise um 300 Euro und können bis zu 1.500 Euro betragen.

5.3 Sind spezielle Dichtungen für die dusche 100×100 notwendig?

Ja, es sind spezielle Dichtungen erforderlich, um Wasserschäden und Undichtigkeiten zu vermeiden und eine langlebige Nutzung zu gewährleisten.

5.4 Was kann ich tun, um die Lebensdauer meiner dusche 100×100 zu verlängern?

Regelmäßige Pflege und Reinigung schützt das Material, und die richtige Luftzirkulation verhindert Schimmelbildung.

5.5 Welche Stile sind für dusche 100×100 erhältlich?

Es gibt vielfältige Stile, darunter modern, klassisch, minimalistisch oder luxuriös, die zu jedem Badezimmer passen.

Die Investition in eine hochwertige dusche 100×100 kann nicht nur Ihren Alltag angenehm gestalten, sondern auch zur Steigerung des Wertes Ihres Hauses beitragen. Durch die Kombination von Stil, Funktionalität und Fortschrittlichkeit wird die dusche 100×100 bald zu einer der Lieblingsstellen Ihres Zuhauses.

Die sonni Duschkabine 90x90 bietet stilvolle Eleganz in modernen Badezimmern.

Die Vorteile der sonni Duschkabine 90×90 für Ihr Badezimmer

Einführung in die sonni Duschkabine 90×90

Die sonni Duschkabine 90×90 hat sich in den letzten Jahren als beliebte Wahl für moderne Badezimmer etabliert. Besonders in städtischen Wohnungen, wo der Platz oft begrenzt ist, bietet diese Duschkabine eine hervorragende Lösung. In diesem Artikel werden wir die Vorzüge, das Design, die Installation und die Pflege der sonni Duschkabine 90×90 ausführlich betrachten.

Was ist die sonni Duschkabine 90×90?

Die sonni Duschkabine 90×90 ist eine kompakte Duschlösung, die speziell für kleinere Badezimmer konzipiert wurde. Ihre quadratische Form ermöglicht eine effiziente Nutzung des verfügbaren Raums und bietet gleichzeitig ausreichend Platz für eine komfortable Dusche. Mit einem Maß von 90×90 Zentimetern passt sie perfekt in fast jede Badezimmerumgebung.

Merkmale und Vorteile

Ein wesentliches Merkmal der sonni Duschkabine 90×90 ist die hochwertige Verarbeitung. Die Verwendung von bruchsicherem Sicherheitsglas sorgt für Langlebigkeit und Sicherheit. Zusätzliche Vorteile umfassen:

  • Platzsaving Design: Optimal für kleinere Badezimmer.
  • Moderne Ästhetik: Verfügbar in verschiedenen Designs, die sich nahtlos in jedes Badezimmer integrieren lassen.
  • Einfache Reinigung: Die Glasoberflächen sind leicht zu reinigen und reduzieren die Häufigkeit von Schimmelbildung.

Warum eine Duschkabine für Ihr Badezimmer wählen?

Duschkabinen bieten zahlreiche Vorteile im Vergleich zu Badewannen. Sie nutzen den Raum effizienter, verbrauchen weniger Wasser und sind einfacher zu reinigen. Zudem bieten sie ein modernes, minimalistisches Design, das zu einem zeitgemäßen Badezimmerambiente beiträgt. Durch die Wahl der sonni Duschkabine 90×90 entscheiden Sie sich zudem für eine Lösung, die sowohl funktional als auch ästhetisch ansprechend ist.

Design und Funktionalität der sonni Duschkabine 90×90

Moderne Designs für jeden Stil

Die sonni Duschkabine 90×90 wird in verschiedenen Designs angeboten, um unterschiedlichen Stilrichtungen gerecht zu werden. Von minimalistischen Designs bis hin zu eleganten Variationen mit Dekoren: jede Duschkabine ist darauf ausgelegt, das ästhetische Gesamtbild Ihres Badezimmers zu verbessern. Die Verwendung von transparentem Glas lässt den Raum heller und offener wirken, während rahmenlose Modelle für einen modernen, eleganten Look sorgen.

Optimale Raumausnutzung

Die quadratische Form sorgt dafür, dass die sonni Duschkabine 90×90 in Ecken oder beengte Räume eingeplant werden kann ohne dass direkt auf Komfort verzichtet werden muss. Ein kluges Konstruktionsdesign ermöglicht außerdem die Anbringung von Regalen oder Aufbewahrungslösungen in der Nähe, was zusätzlichen Stauraum schafft.

Benutzerfreundliche Funktionen

Die Duschkabine ist nicht nur stylish, sondern auch benutzerfreundlich gestaltet. Einfache Öffnungsmechanismen und rutschfeste Bodenbeläge erhöhen die Sicherheit. Zudem bieten viele Modelle optionale Einbauelemente wie Regenduschen, verstellbare Duschköpfe und integrierte Ablagen, die den Duschvorgang komfortabler gestalten.

Installation der sonni Duschkabine 90×90

Schritte zur Installation

Die Installation der sonni Duschkabine 90×90 kann meist als ein einfacheres Heimwerkerprojekt betrachtet werden, erfordert jedoch einige grundlegende Fähigkeiten. Hier sind die Schritte, die zur Installation erforderlich sind:

  1. Vorbereitung des Installationsbereichs und Sicherstellen, dass alle Materialien vorhanden sind.
  2. Das genaue Maß für den Platz und die Positionieren der drainage.
  3. Zusammenbau der Duschkabine gemäß Herstelleranleitung.
  4. Installation der Duschwanne und der Abflüsse.
  5. Überprüfen Sie alle Dichtungen und Sicherungen, um Wasseraustritt zu vermeiden.

Was Sie beachten sollten

Beim Installieren ist es wichtig, auf die Wandbeschaffenheit, den Untergrund und die Nähe zu Wasseranschlüssen zu achten. Achten Sie auch darauf, geeignete Schutzmaßnahmen während der Installation zu ergreifen, um Schäden an vorhandenen Fliesen oder Möbeln zu vermeiden.

Häufige Fehler und wie man sie vermeidet

Ein häufiger Fehler bei der Installation ist die falsche Ausrichtung der Duschkabine, was zu Undichtigkeiten führen kann. Um dies zu vermeiden, sollten Sie sicherstellen, dass die Duschkabine vollständig waagerecht installiert wird. Außerdem ist eine frische Abdichtung wichtig, um Wasserlecks zu vermeiden.

Pflege und Wartung der sonni Duschkabine 90×90

Reinigungstipps für eine langlebige Nutzung

Für eine lange Lebensdauer ist die regelmäßige Pflege unerlässlich. Verwenden Sie milde Reinigungsmittel, um Kalkablagerungen zu verhindern und Halten Sie die Oberflächen mit einem geeigneten Tuch trocken. Vermeiden Sie scharfe Chemikalien, die das Glas oder die Dichtungen schädigen könnten.

Welches Zubehör ist notwendig?

Einige nützliche Zubehörteile umfassen Regalhalterungen, Duschmatten und spezielle Reinigungswerkzeuge für Glasoberflächen. Weitere Geräte wie Duschvorhänge oder Spritzschutzsysteme können ebenfalls nützlich sein, um Feuchtigkeit im Raum zu minimieren.

Tipps zur Vermeidung von Schimmel

Schimmelbildung ist ein häufiges Problem in Badezimmern. Um dies zu vermeiden, ist eine gute Belüftung entscheidend. Achten Sie darauf, dass trockene Handtücher aufgehängt werden und nach jeder Dusche die Kabine gut gelüftet wird. Gelegentliches Wischen der Wände kann ebenfalls helfen, um feuchte Stellen zu vermeiden.

Mobile Anwendungsoptionen der sonni Duschkabine 90×90

Entwicklung der Duschkabinen-Technologie

Die Technologie hinter Duschkabinen hat sich im Laufe der Jahre erheblich weiterentwickelt. Innovative Designs und Materialien bieten nicht nur einen verbesserten Komfort, sondern auch eine effizientere Nutzung von Wasser und Energie. Hersteller nutzen energieeffiziente Technologien, um nachhaltige Produkte anzubieten, die weniger Ressourcen verbrauchen.

Integration in Smart-Home-Systeme

Immer mehr Duschkabinen, darunter auch die sonni Duschkabine 90×90, bieten die Möglichkeit zur Integration in Smart-Home-Systeme. Dies ermöglicht die Steuerung der Duschfunktionen über mobile Apps, was zusätzlichen Komfort und Personalisierung bietet.

Nachhaltigkeit und Energieeffizienz

Nachhaltigkeit ist ein wachsendes Anliegen, und viele Duschkabinen sind jetzt so konzipiert, dass sie Wasser und Energie sparen. Durch die Wahl umweltfreundlicher Optionen trägt die sonni Duschkabine 90×90 nicht nur zu einem schönen Badezimmer bei, sondern auch zu einem verantwortungsbewussteren Umgang mit natürlichen Ressourcen.

Häufig gestellte Fragen

1. Was sind die Maße der sonni Duschkabine 90×90?

Die sonni Duschkabine 90×90 hat die Standardmaße von 90 cm x 90 cm, ideal für kompakte Badezimmer.

2. Wie reinige ich die sonni Duschkabine 90×90 am besten?

Verwenden Sie milde Reinigungsmittel und weiche Tücher, um Kalkablagerungen und Seifenreste zu entfernen.

3. Ist die Installation der Duschkabine schwierig?

Die Installation kann von einem geübten Heimwerker durchgeführt werden, erfordert jedoch sorgfältiges Arbeiten und die richtige Ausrüstung.

4. Gibt es zusätzliche Optionen für Ablagen?

Ja, es gibt eine Vielzahl von Regaloptionen und Ablagen, die in der Duschkabine integriert werden können.

5. Wie kann ich Schimmelbildung in der Duschkabine vermeiden?

Gute Belüftung und regelmäßiges Abtrocknen der Wände verhindern Schimmelbildung und halten die Kabine frisch.

Admiring elegant shower bases in a stylish bathroom that highlight modern design and functionality.

Stylish and Durable Elegant Shower Bases for Modern Bathrooms

The Benefits of Choosing Elegant Shower Bases

Enhancing Aesthetic Appeal

Choosing elegant shower bases can instantly elevate the look of your bathroom. Their sleek designs and modern finishes offer a sophisticated touch, suitable for various interior styles—from minimalistic to opulent. The visual impact of an elegant shower base isn’t only about aesthetics; it can transform the overall feel of your space, making it more inviting and luxurious.

Additionally, the range of colors and textures available allows homeowners to coordinate their shower bases with existing fixtures, tiles, and decor. This versatility ensures that no matter the theme of your bathroom, there is an elegant shower base that can seamlessly blend in or contrast beautifully with your design.

Durability and Maintenance

Another significant benefit of elegant shower bases is their durability. Made from high-quality materials, they often withstand heavy use without showing signs of wear and tear. For example, acrylic and composite materials are not only impact-resistant, but they are also resistant to mold and mildew, which is essential in a high-moisture environment.

Maintenance is also a breeze; many elegant shower bases can simply be wiped down to keep them looking fresh. The right finish can minimize the appearance of water spots and soap scum, allowing your shower base to maintain its pristine look with minimal effort.

Floor Space Efficiency

Elegant shower bases often boast a design that optimizes floor space, perfect for every size of bathroom. In smaller bathrooms, they can create the illusion of more space, enhancing the overall functionality of the room. A well-selected shower base can help define the area without overwhelming the room.

Furthermore, the compact design of many modern elegant shower bases allows designers to incorporate features such as built-in storage or seating, maximizing both style and utility. This efficiency is a practical consideration, particularly in urban environments where space is at a premium.

Materials Used in Elegant Shower Bases

Popular Material Choices

When it comes to selecting materials for elegant shower bases, several options are popular due to their unique benefits. Acrylic stands out for its lightweight properties and ability to be molded into various shapes, making it perfect for customized designs. On the other hand, porcelain and ceramic tile bases are renowned for their sturdiness and timeless appeal, providing a classic look with the durability needed for everyday use.

Composite materials, combining stone and resin, offer the best of both worlds: the luxurious appearance of natural stone with the ease of maintenance that engineered products provide. Each material choice offers distinct aesthetic and functional benefits, appealing to a wide range of preferences and requirements.

Long-Term Performance

The long-term performance of elegant shower bases is influenced significantly by the material from which they are made. High-quality acrylic bases tend to retain their color and finish for many years, resisting fading and cracking, which is a common issue with lesser quality products. Stone composite bases combine the beauty of stone with the resilience of synthetic materials, ensuring they remain appealing and functional for a long period.

Moreover, the right installation method can enhance the lifespan of your shower base, preventing common issues such as leaks or water damage. A well-constructed base effectively channels water, reducing the risk of warping and ensuring many years of reliable service.

Environmental Considerations

Eco-conscious homeowners will appreciate that many manufacturers produce elegant shower bases using sustainable practices and materials. For instance, some shower bases may incorporate recycled materials—helping to reduce waste while still providing a stylish and functional product. Additionally, the long lifespan of high-quality materials means they contribute less to landfill waste over time.

Choosing shower bases that are manufactured with low-VOC materials can also improve indoor air quality, lowering the chances of harmful chemicals being emitted into your home. Such environmentally friendly options allow homeowners to indulge in luxury without compromising their commitment to sustainability.

Installation Guide for Elegant Shower Bases

Tools Required for Installation

Installing elegant shower bases requires specific tools to ensure a proper fit and a watertight seal. Essential tools include a level, measuring tape, a caulking gun, a utility knife, and a drill. Having these items on hand not only simplifies the installation process but helps avoid common pitfalls that can arise from improper installation.

In addition, it’s beneficial to have a partner available during installation, as this can expedite the process and reduce the chances of mistakes, especially when aligning the base and securing it in place.

Step-by-Step Installation Process

1. Prepare the Area: Begin by clearing the existing shower space and ensuring the floor is level and clean.

2. Measure and Mark: Using a measuring tape, mark the appropriate location for your shower base. It’s crucial to ensure that it aligns with existing plumbing fixtures.

3. Dry Fit the Base: Place the shower base into position to check the fit. Make necessary adjustments to the plumbing if needed.

4. Secure the Base: Follow the manufacturer’s guidelines to attach and secure the base to the substrate. Use a level to confirm it is even.

5. Seal the Edges: Apply a waterproof sealant around the edges of the base to prevent leaks. This step is critical to ensuring a long-lasting installation.

6. Install Walls/Screens: Follow with the installation of any required walls or screens surrounding the shower area.

7. Testing: Before utilizing the shower, conduct a water test to check for leaks and ensure all connections are secure.

Common Installation Mistakes

Even a simple installation of elegant shower bases can be marred by mistakes. One common issue is misalignment, which could lead to leaks and costly repairs. Ensure that measurements are repeat-checked before cutting or drilling.

Another frequent mistake is inadequate sealing. Skimping on caulk or sealant can lead to water damage over time, affecting both the aesthetics and structure of your home. Always follow the recommended adhesive procedures for the specific shower base material being installed.

Finally, failing to confirm that the base is level can lead to drainage issues. Take your time in this step, as it is crucial for ensuring proper water flow and overall performance.

Choosing the Right Size and Style

Measuring Your Space

To choose the right elegant shower base, accurate measurements are essential. Start by measuring the length and width of the available space. Additionally, consider the height of the surrounding fixtures, as this can affect both comfort and functionality when using the shower.

Don’t forget to account for additional features, such as sliding doors or built-in shelves, which may require specific dimensions. A well-measured base not only fits properly but also enhances the overall design flow of your bathroom.

Design Style Compatibility

Another crucial factor in selecting an elegant shower base is ensuring that its style complements the overall theme of your bathroom. For modern designs, sleek lines and solid colors tend to work best, while rustic-style bathrooms may benefit from textures mimicking natural stone or wood.

Consider the finishes of other elements in your bathroom, such as tiles, faucets, and cabinetry. A cohesive look can be achieved by matching finishes or choosing contrasting ones deliberately for a more dynamic visual effect.

Customization Options

Many suppliers of elegant shower bases offer customization options that allow homeowners to tailor their shower bases for both function and style. Customizable options may include specific sizes, colors, and designs that cater to unique bathroom layouts.

In addition, some manufacturers allow you to choose additional features such as integrated storage options, seats, or specific drainage systems that can enhance the usability of the shower. Utilizing these options ensures that you not only get a beautiful shower base but one that fits your personal needs perfectly.

Frequently Asked Questions About Elegant Shower Bases

What are the best materials for shower bases?

Acrylic, porcelain, and stone composites are popular for their durability, aesthetic appeal, and resistance to mold. Each material offers different advantages, tailoring to individual style and functionality preferences.

How do I maintain my shower base?

Regular cleaning with non-abrasive cleaners is recommended. Rinse with water after use to prevent soap scum buildup, and check for signs of wear to address issues promptly.

Can elegant shower bases be customized?

Yes, many brands offer customization options for size, color, and design. This flexibility allows homeowners to create a shower base that best fits their space and personal style.

What styles of shower bases are available?

Styles range from modern sleek designs to traditional textured finishes. Popular shapes include square, rectangular, and neo-angle bases to fit different bathroom layouts.

How do I choose the right size for my shower base?

Measure the available space accurately, considering the dimensions of plumbing fixtures and any surrounding features. Ensure that the base size complements your bathroom’s overall layout.

Transform your space with a sleek led mirror bathroom that enhances modern aesthetics.

Elevate Your Space with a Stylish Led Mirror Bathroom

Introduction to Led Mirror Bathroom Designs

When you think of transforming your bathroom into a stylish and functional oasis, the led mirror bathroom is a standout option. These mirrors not only provide essential reflection but also enhance lighting, contributing to an inviting ambiance. With advancements in technology, LED mirrors have evolved beyond mere aesthetics, offering features that greatly enhance functionality. This article delves into the world of led mirror bathrooms, discussing their benefits, popular styles, and practical considerations for choosing and maintaining one.

What is a Led Mirror Bathroom?

A led mirror bathroom is characterized by the integration of LED lighting within or around the mirror itself. These mirrors often feature a sleek, modern design that combines both practicality and elegance. Typically used in bathrooms, they serve multiple purposes: providing clear reflections, illuminating the space, and enhancing the overall décor of the room.

From backlit models that glow softly to more advanced designs with adjustable color temperatures, led mirrors have become a quintessential element in contemporary bathroom settings. They can range in size, shape, and features, making them versatile enough to fit various design themes—be it minimalist, luxurious, or somewhere in between.

Benefits of Led Mirrors

  • Enhanced Visibility: LED mirrors provide superior illumination, which is essential for tasks like shaving, make-up application, or just adjusting your appearance.
  • Energy Efficiency: LEDs are known for their energy-saving capabilities compared to traditional lighting, which can lead to cost-effective long-term use.
  • Longevity: LED lights typically have a longer lifespan, meaning less frequent replacements and less hassle.
  • Variable Lighting Options: Many models offer adjustable brightness and color settings, allowing personalization based on time of day or mood.
  • Modern Aesthetics: Their sleek design adds a touch of contemporary elegance to any bathroom, creating a more sophisticated atmosphere.

Popular Styles and Trends

As the design landscape continues to evolve, led mirror bathrooms embrace a variety of styles catering to diverse tastes:

  • Frameless Designs: These mirrors, seamless and sleek, provide a clean look that complements minimalist and modern aesthetics.
  • Smart Mirrors: More than just mirrors, these products come equipped with smart technology, offering features like touchscreens, Bluetooth speakers, and integrated clock displays.
  • Aged or Vintage Finishes: Combining traditional styles with modern illumination, these mirrors appeal to those who appreciate a more classic look but still want the benefits of LED lighting.
  • Statement Mirrors: Oversized or uniquely shaped mirrors become the focal point of the bathroom, often featuring bold LED outlines.

Choosing the Right Led Mirror Bathroom

With so many options available, selecting the perfect led mirror bathroom involves careful consideration of various factors to ensure it aligns with your needs and enhances your space effectively.

Size and Dimensions Considerations

Before purchasing a led mirror bathroom, it’s crucial to assess the available wall space and determine the ideal size. A mirror that is too small may not provide the necessary functionality, while an oversized model can overwhelm the space. It’s also essential to consider the mirror’s height in relation to your vanity and sink for practical usability.

Frameless vs. Framed Mirrors

The decision between frameless and framed mirrors is often dictated by your bathroom’s decor.

  • Frameless Mirrors: Their modern, clean lines make them ideal for minimalistic designs, allowing for focus on lighting and reflection without additional distractions.
  • Framed Mirrors: Available in various materials and styles, framed mirrors can add character and complement the overall design theme of your bathroom.

Lighting Features to Look For

When selecting a led mirror bathroom, consider the following lighting features:

  • Brightness Adjustment: Dimmable mirrors allow for customizable brightness, tailoring the lighting to the task at hand.
  • Color Temperature Control: Options to adjust between cool and warm lights can help create different atmospheres, making a bathroom feel more inviting.
  • Integrated Touch Controls: Mirrors with built-in touch sensors provide convenient control over lighting features.

Installation Guide for Led Mirror Bathrooms

Installing a led mirror bathroom can be a straightforward process if you follow the correct steps. Professional installation is often recommended for electrical connections, but with careful planning, a DIY setup can also yield great results.

Preparation of the Space

Before installation, clear the area where the led mirror will be mounted. This includes removing old mirrors and ensuring the wall is clean and dry. If your mirror requires a power source, check for proximity to electrical outlets and assess if you need to wire a new connection.

Wiring and Electrical Considerations

Due to the electrical elements involved, ensure that you follow safety protocols. It’s advisable to consult an electrician to handle wiring unless you’re confident in your skills. Confirm that all electrical connections are properly insulated to avoid any hazards.

Mounting Options and Techniques

Most led mirrors come with mounting brackets. Ensure you securely attach the mirror to the wall, using anchors suited for your wall type. Assistance during this process is often beneficial to prevent accidents or misalignment.

Maintenance Tips for Longevity

To maximize the lifespan and effectiveness of your led mirror bathroom, proper maintenance is essential.

Cleaning and Care Techniques

Regular cleaning helps maintain clarity and prevent build-up. Use a soft, non-abrasive cloth and mild soap or a glass cleaner to wipe the surface. Avoid harsh chemicals that may damage the mirror’s finish or affect the LED components.

Addressing Common Issues

Occasionally, LED lights may flicker or fail. Ensure all connections are secure and check for faulty wiring. Professional help may be needed if problems persist. Additionally, if the mirror surface shows signs of cloudiness, it may need a more thorough cleaning.

Enhancing Durability and Functionality

For added functionality, consider mirrors with anti-fog features, which are particularly useful in bathrooms prone to steam. Regularly checking the integrity of the mastic or adhesive used during installation can also prevent future damage.

Frequently Asked Questions

What is the best size for a Led Mirror Bathroom?

The best size for a led mirror bathroom depends on available wall space and the height of the vanity. Generally, the mirror width should be at least two-thirds the width of the sink for optimal functionality.

Are Led Mirrors energy-efficient?

Yes, led mirrors are highly energy-efficient compared to traditional incandescent lighting. They consume less power while providing bright illumination, resulting in lower energy bills.

Can I install a Led Mirror Bathroom myself?

Installation can be done DIY, but safety is crucial—especially for electrical connections. If unfamiliar with wiring, consider hiring a professional for a safe setup.

What maintenance is required for these mirrors?

Maintain by regularly cleaning the mirror with a soft, non-abrasive cloth and mild cleaner. Also, check connections for any flickers or issues to ensure longevity.

Do Led Mirrors work with smart home systems?

Many modern led mirrors can integrate with smart home systems, allowing for voice commands or mobile control of lighting settings, enhancing convenience and functionality.

Showcase of innovative shower doors sliding open in a modern bathroom setting

Enhancing Your Bathroom: Stylish Shower Doors Sliding Solutions

Understanding Shower Doors Sliding

What Are Shower Doors Sliding?

Shower doors sliding are a type of enclosure that provides a seamless barrier between your shower area and the rest of your bathroom. Typically featuring two or more glass panels that slide open and closed, these doors make efficient use of space, especially in smaller bathrooms. They combine aesthetics with functionality, ensuring that moisture stays contained within the shower while also allowing easy access. The glass panels are usually made from tempered safety glass, adding a layer of durability and security.

Types of Shower Doors Sliding Available

When it comes to shower doors sliding, you can choose from a variety of styles to suit your bathroom’s design. Here are some common types:

  • Frameless Sliding Doors: These doors have minimal hardware and offer a modern, sleek appearance. The absence of a frame makes them an excellent choice for showcasing beautiful tile work.
  • Semi-Framed Sliding Doors: These combine the stability of a frame with the elegance of glass. They offer more options for design and are often a more budget-friendly solution.
  • Framed Sliding Doors: These are the most traditional type, with a fully enclosed frame. While they can be less visually appealing, they are often more economical and easier to install.

Benefits of Choosing Shower Doors Sliding

The advantages of opting for shower doors sliding are numerous:

  • Space Efficiency: Sliding doors do not require any clearance space, making them ideal for smaller bathrooms.
  • Variety of Designs: With various styles available, you can easily match them to your bathroom’s décor.
  • Easy Maintenance: Glass doors are relatively easy to clean, and many modern doors come with protective coatings that reduce limescale buildup.
  • Enhanced Aesthetics: Their sleek look can elevate the overall feel of your bathroom, providing a contemporary edge.
  • Increased Property Value: Attractive and functional shower doors can enhance your home’s appeal and increase its market value.

Selecting the Right Shower Doors Sliding for Your Space

Measuring Your Bathroom for Shower Doors Sliding

Accurate measurements are crucial when selecting shower doors sliding. You need to measure the width and height of your shower opening. To do this:

  1. Measure the width of the shower entry at the top and bottom to ensure a consistent fit.
  2. Measure the height from the top of the threshold to the top of the opening.
  3. Consider any fixtures like faucets or shower heads that may affect the installation.

Choosing Materials for Shower Doors Sliding

The materials used for shower doors sliding greatly influence both their appearance and durability. Common choices include:

  • Tempered Glass: Stronger and safer than regular glass, tempered glass is a popular choice due to its resilience and clarity.
  • Plastic Vinyl: A more economical option, this material can be less durable but is available in many styles.
  • Aluminum: Often used in framing, aluminum is lightweight and resistant to corrosion, making it a practical choice.

Design Styles: Matching Shower Doors Sliding to Your Decor

Your shower door should harmonize with your bathroom’s overall aesthetic. Below are several design considerations:

  • Modern: Opt for minimalist frameless designs to complement sleek and simple bathroom features.
  • Classic: Semi-framed and framed doors with traditional finishes can enhance a more classic or rustic bathroom style.
  • Industrial: Choices that feature metal frames with dark finishes can add a unique contrast to modern design.

Installation Process for Shower Doors Sliding

Preparing Your Space for Shower Doors Sliding

Before installation, it’s vital to prepare your bathroom space appropriately. Clear any obstructions in the area and assess the walls for levelness and any needed repairs. Make sure the shower base is secure and has proper drainage.

Tools Needed for Installation of Shower Doors Sliding

Having the right tools on hand can make the installation process of shower doors sliding smoother. You will typically need:

  • Measuring tape
  • Level
  • Drill and drill bits
  • Screwdriver
  • Silicone sealant
  • Safety goggles and gloves

Step-by-Step Guide to Installing Shower Doors Sliding

Follow these steps to install your shower doors sliding effectively:

  1. Measure and Mark: Using a level, mark where the top track will be placed on the wall.
  2. Install the Top Track: Drill holes and install the top track securely, ensuring it is level.
  3. Insert the Rollers: Attach the rollers to the top of each shower door before positioning them onto the track.
  4. Attach the Bottom Track: Secure the bottom track to the shower base following the manufacturer’s instructions.
  5. Seal the Edges: Use silicone sealant to seal any gaps between the doors and the wall to prevent leaks.
  6. Test Functionality: Open and close the doors to ensure they slide smoothly and adjust if necessary.

Maintenance Tips for Shower Doors Sliding

Cleaning Your Shower Doors Sliding Effectively

Regular cleaning keeps your shower doors sliding looking pristine. Use a non-abrasive cleaner and a soft cloth or sponge. For stubborn stains or soap scum, a mixture of vinegar and baking soda can work wonders. For preventative maintenance, consider using a daily shower spray to reduce buildup.

Common Issues with Shower Doors Sliding and How to Fix Them

Some common challenges with shower doors sliding include:

  • Doors Sticking: Ensure the tracks are clean and free of debris. You can also apply lubricant to the rollers.
  • Leaking: Check the seals and apply silicone if necessary to close any gaps.
  • Squeaking Sounds: This can usually be resolved with a simple thorough cleaning and lubrication of moving parts.

When to Replace Your Shower Doors Sliding

Shower doors sliding can last for many years, but it may be time to replace them if you notice significant wear, such as cracks in the glass, rust on the frames, or if they no longer operate smoothly. Enhanced functionality and appearance are also good reasons to consider an upgrade.

Frequently Asked Questions About Shower Doors Sliding

How do I measure for shower doors sliding?

Measure the width and height of your shower opening for proper fitment, checking both top and bottom for consistency.

Can I install shower doors sliding by myself?

Yes, with proper tools and guidance, many homeowners can install them independently. Experience with DIY projects helps.

How do I clean shower doors sliding?

Use a non-abrasive cleaner and a soft cloth to avoid scratching. Regular maintenance keeps them looking great.

What styles of shower doors sliding are available?

Options include frameless, semi-framed, and framed designs, each providing unique aesthetics and functionalities.

How long do shower doors sliding last?

With proper care, shower doors sliding can last many years, often up to a decade or more, depending on usage and materials.

Explore elegant shower doors with sleek designs that enhance modern bathroom aesthetics.

Transform Your Bathroom with Elegant Shower Doors: A Style Guide

Understanding Elegant Shower Doors

When it comes to bathroom renovations, few elements can have as significant an impact as elegant shower doors. These stylish fixtures not only enhance the visual appeal of your bathroom but also contribute to its functionality. In this article, we’ll delve deeply into various aspects of elegant shower doors, from types and benefits to installation processes and maintenance tips.

Types of Elegant Shower Doors

There is a wide variety of elegant shower doors available, each designed to meet specific needs and preferences. Understanding these types will help make an informed decision.

Frameless Shower Doors

Frameless shower doors are a popular choice for modern bathrooms. With clear glass and no visible metal framing, they provide a sleek, minimalist look that opens up the space and creates an illusion of depth.

Framed Shower Doors

In contrast, framed shower doors come with a sturdy metal frame that adds durability and structure. They are available in various finishes, offering versatility in design while still ensuring effective water containment.

Bi-Fold Shower Doors

Bi-fold shower doors are ideal for smaller bathroom spaces. They fold inwards, providing easy access while minimizing the space they occupy when open, making them a practical yet stylish option.

Sliding Shower Doors

Sliding doors provide a convenient solution for larger shower areas. These doors glide effortlessly on tracks, allowing for seamless entry and exit, making them perfect for busy households.

Benefits of Using Elegant Shower Doors

Incorporating elegant shower doors in your bathroom renovation can significantly enhance both aesthetic and functional aspects. Here are some key benefits:

Enhanced Aesthetics

Elegant shower doors add an upscale touch to any bathroom, improving its overall look. The variety of glass types and finishes allows homeowners to customize their space according to personal style.

Improved Functionality

Not only do they look good, but elegant shower doors also function effectively. They contain water within the shower space, preventing misdirected splashes and keeping the rest of the bathroom dry.

Durability

Quality shower doors are made from high-strength tempered glass and durable materials, providing longevity and resilience against daily use.

Increased Home Value

Investing in elegant shower doors is not just about immediate aesthetics; they also increase the value of your home, making it more appealing to potential buyers.

Choosing the Right Elegant Shower Doors for Your Space

Selecting the perfect elegant shower doors involves more than just aesthetics; functionality and space considerations are equally essential. Here’s how to choose wisely:

Assess Your Bathroom Size

Measure the space where the shower door will be installed. Smaller bathrooms may benefit from bi-fold or sliding doors, while larger spaces can accommodate framed or frameless designs.

Consider the Style of Your Bathroom

The shower door should complement the existing decor. For a modern look, opt for frameless doors; for a traditional space, framed options may be more suitable.

Think About Your Budget

Determine how much you’re willing to spend on elegant shower doors. Prices can vary greatly, so ensure you’ve considered the cost against the quality and aesthetics.

Design Inspirations for Elegant Shower Doors

The design of your shower doors can significantly affect your bathroom’s overall theme. Let’s explore some inspiring ideas.

Modern Trends in Elegant Shower Doors

Modern trends lean towards clean lines and minimalist designs. Popular innovations include:

  • Matte black hardware for a striking contrast against clear glass
  • Textured or frosted glass for added privacy while maintaining style
  • Bold geometric shapes to create a unique shower space

Combining Colors and Materials

Integration of various colors and materials can enhance the elegance of shower doors. Consider:

  • Brushed nickel or gold finishes for the frame to match faucets.
  • Contrast between dark frames and bright tiles for visual interest.

Creating a Cohesive Bathroom Look

Ensure that the design of your elegant shower doors harmonizes with other elements in the bathroom. This includes coordinating colors with cabinetry, tiles, and fixtures to create a balanced look.

Installation Process of Elegant Shower Doors

Installing elegant shower doors can appear daunting, but with the right preparation and method, it can be achieved effectively.

Preparing Your Bathroom

Proper preparation is crucial before installation. Ensure the shower space is clean and free of debris. Also, check that the wall is plumb and the floor is level to ensure a proper fit for your elegant shower doors.

Step-by-Step Installation Guide

Follow these steps for a successful installation:

  1. Gather Your Tools: You will need a drill, level, measuring tape, and the shower door kit.
  2. Take Accurate Measurements: Measure height and width of the opening to purchase doors that fit perfectly.
  3. Install Wall Brackets: Using a drill, secure the wall brackets on each side where the door will hang.
  4. Hang the Door: Align the shower door with the wall brackets and secure it in place.
  5. Add Finishing Touches: Install handles and check for smooth operation.

Common Installation Challenges

During installation, homeowners may face some challenges, such as:

  • Incorrect Measurements: This can lead to improper door fitting, necessitating adjustments.
  • Level Issues: Ensuring the opening is perfectly level is key to door functionality.
  • Hinge Alignment: Misaligned hinges can result in doors that do not close properly.

To mitigate these, always double-check measurements and follow installation instructions carefully.

Maintenance Tips for Elegant Shower Doors

To ensure your elegant shower doors remain pristine, consider the following maintenance tips:

Cleaning Solutions and Techniques

Regular cleaning is essential to keep shower doors looking their best. Use a mixture of vinegar and water to remove soap scum without scratching the glass. Microfiber cloths work best to avoid streaks.

Preventing Water Damage

Water damage can be a significant concern, especially in bathrooms. Ensure proper sealing around the doors and consider installing a water softener to reduce mineral buildup.

Restoring Shine to Your Elegant Shower Doors

If your shower doors begin to look dull, restore their shine by using commercial glass cleaners or a baking soda paste. Rinse thoroughly and buff with a dry cloth to bring back their sparkle.

Frequently Asked Questions About Elegant Shower Doors

How do I measure for elegant shower doors?

Measure the width of the opening at the top, middle, and bottom, then measure the height on both sides. Use the smallest measurements for a proper fit.

Can I install elegant shower doors myself?

Yes, with proper tools and patience, most homeowners can successfully install elegant shower doors by following detailed instructions.

What materials are best for elegant shower doors?

Tempered glass is the best material for shower doors due to its strength and safety features, combined with durable hardware for support.

How do I maintain my elegant shower doors?

Regularly clean with vinegar and water, dry immediately after use, and check seals to prevent water damage and extend longevity.

Are elegant shower doors worth the investment?

Absolutely! They enhance aesthetic value, functionality, and the overall appeal of your bathroom, making them a worthwhile investment.

Captivating window tint gift card showcased on a modern desk in an inviting automotive setting.

Enhancing Experience with a Window Tint Gift Card for Your Loved Ones

Introduction to Window Tint Gift Card

Gift-giving can be a challenging task, especially when trying to find something unique and thoughtful. One outstanding option that may not always come to mind is the window tint gift card. This innovative gift allows recipients to enhance their vehicles while enjoying a host of benefits that go beyond mere aesthetics. In this article, we will explore everything you need to know about window tint gift cards, from what they are to how they can be effectively used.

What is a Window Tint Gift Card?

A window tint gift card is a prepaid card that can be used toward services related to window tinting for vehicles, homes, or businesses. These cards typically come with a set monetary value and can be redeemed at authorized window tinting service providers. The versatility of window tint gift cards makes them a practical choice for anyone looking to enhance privacy, control glare, and improve energy efficiency through window tinting services.

Benefits of Giving a Window Tint Gift Card

Giving a window tint gift card provides several notable advantages:

  • Personalization: Unlike generic gifts, a window tint gift card allows the recipient to choose the type and level of tint that best suits their needs.
  • Practical Utility: Window tinting offers numerous benefits such as heat reduction, UV protection, and added privacy, making this gift not just thoughtful but also useful.
  • Flexibility: Recipients can use the gift card when it suits them, removing the stress of coordinating schedules or feelings of obligation.
  • Sustainability: Investing in window tinting can lead to increased energy efficiency, which contributes positively to environmental sustainability.

Who Would Love a Window Tint Gift Card?

Gift cards for window tinting are ideal for a wide range of individuals, including:

  • New Car Owners: Individuals who recently purchased a vehicle will appreciate the opportunity to customize it.
  • Homeowners: Those looking to enhance their home’s energy efficiency and curb appeal with window film.
  • Business Owners: Businesses seeking to boost privacy, security, and energy conservation in their premises.
  • Fashion-Conscious Friends: Anyone who takes pride in their appearance and wants to enhance their vehicle’s aesthetics.

How to Purchase a Window Tint Gift Card

Finding the Right Provider

Finding the right provider is crucial for your window tint gift card purchase. Look for established window tinting businesses with positive customer reviews and a reputation for quality. Research online and ask around for recommendations to ensure you select a trustworthy provider.

Payment Options for Window Tint Gift Card

Most providers offer various payment methods for purchasing a gift card, including credit/debit cards, cash, and sometimes digital payment options. Be sure to understand the payment options available at your chosen provider, as this can influence your overall buying experience.

Customizing Your Gift Card Purchase

Many providers allow you to customize the gift card. You may be able to choose the design, include a personal message, and select the amount on the card. Customization makes your gift more personal and adds an extra touch of thoughtfulness.

Using a Window Tint Gift Card Effectively

Understanding Redemption Procedures

Each window tint service provider may have different redemption policies. Generally, the recipient will need to present the gift card at the time of service. It’s important to read the terms and conditions associated with the card to avoid any potential misunderstandings.

Scheduling an Appointment

To use the window tint gift card, the recipient will need to schedule an appointment with the chosen provider. It’s advisable to book in advance due to potential high demand, especially during peak seasons. Make sure they bring the gift card to the appointment to ensure a smooth transaction.

Maximizing the Benefits of Your Window Tint Gift Card

To get the most out of a window tint gift card, the recipient should consider the following tips:

  • Research Options: Look into different types, colors, and levels of tinting available to choose the best fit.
  • Inquire About Deals: Providers may have ongoing promotions; combining these with the gift card can maximize savings.
  • Understand the Warranty: Check the warranty on window tint films to know the long-term benefits and protection.

Popular Choices for Window Tinting

Types of Window Tint Films

Different types of window tint films suit various needs and preferences. Common types include:

  • Dyed Window Tint: Offers privacy and reduces glare but provides less heat rejection.
  • Metalized Film: Contains small metallic particles that increase heat rejection and provide additional durability.
  • Ceramic Film: Blocks UV rays and heat without a reflective look, allowing for a clear view.

Comparing Window Tint Options

Comparing various window tint options involves considering factors such as heat reduction, UV protection, darkness levels, and aesthetics. Each type has its strengths, making it essential to evaluate them based on the specific needs and requirements of the recipient’s vehicle or property.

Trends in Window Tinting

The window tinting industry is evolving, with new trends emerging. Some of these include:

  • Eco-Friendly Films: More consumers are seeking options that reduce environmental impact.
  • Smart Films: Innovative technology allows films to be remotely adjusted for varying levels of shading and transparency.
  • Stylish Options: Colored tints and decorative films are gaining popularity, allowing owners to express their personality.

FAQs About Window Tint Gift Card

What are the common uses for a window tint gift card?

Common uses for a window tint gift card include applying tint to vehicle windows, home windows, or business premises to enhance privacy, style, and UV protection.

How long is a window tint gift card valid?

The validity period of a window tint gift card varies by provider, but it is typically between 1 to 5 years from the date of purchase.

Can I combine my window tint gift card with other offers?

Many providers allow gift cards to be combined with promotions or discounts, but it’s essential to check the terms for specific rules.

Are there any restrictions on window tint gift cards?

Restrictions may vary by provider. Common restrictions include specific services covered or a minimum purchase amount required to use the gift card.

How can I check the balance on my window tint gift card?

You can check your window tint gift card balance by visiting the provider’s website, calling customer service, or visiting their location in person.

Complete the eta uk application form efficiently at a tidy workstation.

Steps to Successfully Complete Your eta uk application form

Understanding the eta uk application form

What is the eta uk application form?

The eta uk application form is an online documentation process that allows travelers to apply for an Electronic Travel Authorization (ETA) to enter the United Kingdom. This authorization is essential for non-visa national travelers seeking short-term visits to the UK, whether for tourism, business, or family visits. By filling out the eta uk application form, applicants can streamline their entry into the country, ensuring they meet all immigration requirements without the necessity of a full visa application.

Importance of the eta uk application form

The ETA serves several purposes making the eta uk application form an important gateway to the UK. It enhances the UK’s border security by pre-screening visitors and it simplifies the entry process for travelers by reducing wait times at border control. Moreover, with the advent of the digital age, completing the form online provides a convenient and efficient method for travelers, eliminating the need for physical documentation and long processing times associated with traditional visas.

Eligibility criteria for the eta uk application form

To be eligible for the eta uk application form, applicants must meet specific criteria. Generally, individuals from countries that have a visa-free travel agreement with the UK will fall under this category. The application is typically available for tourists, business travelers, and those visiting family members residing in the UK. Moreover, individuals must ensure they do not have a criminal record that could impede their entry and that their visit is for a valid purpose—such as tourism, attending a conference, or visiting friends and family. Staying up to date with current eligibility guidelines is crucial as regulations may evolve over time.

Gathering Necessary Information

Required documents for the eta uk application form

Completing the eta uk application form necessitates collecting specific documentation. Essential documents include a valid passport, typically one that is valid for at least six months beyond your intended stay, proof of accommodation (like hotel reservations), a travel itinerary explaining the purpose of your visit, and financial documents that demonstrate your capability to support yourself during your stay. Any supporting documents related to the purpose of travel may also be beneficial, especially for business travelers.

Tips for accurate information

Providing accurate information is crucial when filling out your eta uk application form. Start by verifying your passport details against your application. Accuracy regarding personal details such as your name, nationality, date of birth, and passport number can prevent unnecessary delays. Additionally, ensure all supporting documents are up to date and correctly formatted. Taking the time to double-check your entries can save you from potential issues down the line, allowing for smooth processing of your application.

Common mistakes to avoid

While navigating the eta uk application form, applicants may encounter common pitfalls. One frequent error is typos in personal information, which can disrupt processing. Another common mistake is failing to provide adequate information regarding travel history, which is required on the application. It’s also essential to review eligibility; misunderstanding the criteria may lead to applying incorrectly. Lastly, neglecting to check your application’s submission status can result in missed communications from immigration officials.

Filling Out the eta uk application form

Step-by-step instructions

Filling out the eta uk application form can be straightforward when you follow a few essential steps:

  1. Access the Form: Start by visiting the official application website.
  2. Provide Personal Information: Fill in your name, passport details, nationality, and other personal identifiers.
  3. Travel Plans: Indicate your planned entry and exit dates from the UK, along with the purpose of your visit.
  4. Upload Supporting Documents: Attach any necessary documents that validate your purpose for traveling.
  5. Review Your Submission: Finally, thoroughly review your entries for accuracy and completeness before submitting the application.

Online vs. paper applications

The eta uk application form is primarily designed for online submissions, which offer faster processing than traditional paper applications. Online applications facilitate immediate submission and provide timely notifications regarding the status of your submission. Paper applications, though still available in certain situations, tend to have longer processing times due to the manual handling of documents. Consequently, utilizing the online application not only saves time but also increases the likelihood of an efficient processing experience.

Troubleshooting common issues

During the application process, applicants may run into various issues, such as website downtime, difficulty uploading documents, or mistakes in the application form. If the website is unresponsive, it’s advisable to wait and try again later. If you face document upload issues, ensure your files are within the size limitations and appropriately formatted. In case of mistakes, contact support immediately for assistance in updating the information before submission. Keeping all related details at hand can also ease troubleshooting efforts.

Submission and Follow-up

How to submit your eta uk application form?

The submission of the eta uk application form is typically done electronically. Once you have completed your application and ensured that all parts are filled out accurately, you simply click on the submit button on the designated website. After submission, you will receive a confirmation notification via email, which should be saved for your records. This confirmation will contain important information on tracking your application and any reference numbers provided by the processing agency.

Tracking your application status

Tracking your eta uk application status is a straightforward process. After your application has been submitted, you can use the reference number in your confirmation email to check the status on the official tracking page. Regularly checking the status will allow you to stay informed about any requirements for additional information or clarification needed from your end. Typically, you should expect to receive a notification regarding your application status via email as well.

What to do if your application is rejected

If your eta uk application form is rejected, it can be disheartening, but there are steps you can take. Initially, review the rejection notice for specific reasons that led to the denial. Depending on the issue cited, you may be able to resolve the problem by reapplying with corrected information or providing additional documentation to support your case. If you believe the rejection was unjust, you may also have the option to appeal the decision, following the guidelines provided in your rejection letter.

FAQs about the eta uk application form

How long does the eta uk application form take to process?

Processing times for the eta uk application form can vary depending on the volume of applications. Generally, applications are processed quickly, often within 24-72 hours.

Can I edit my eta uk application form after submission?

Once submitted, you typically cannot edit your eta uk application form. It’s advisable to review all information carefully before submission to avoid errors.

Is there a fee for the eta uk application form?

Yes, there is often a fee associated with the eta uk application form. The exact cost may vary depending on current regulations, so it’s important to check the official site for updated fees.

What if I miss the application deadline?

If you miss the application deadline, you will need to reapply for an ETA. Make sure to submit your application early to avoid any last-minute issues.

Where can I find additional resources on the eta uk application form?

For further information on the eta uk application form, refer to official government websites and dedicated travel advisory platforms for updated guidelines and FAQs.

Enhance your audio with our online mastering services in a professional recording studio setup.

Mastering Your Sound: Comprehensive Online Mastering Services for Musicians

Understanding Online Mastering Services

What are Online Mastering Services?

Online mastering services are digital solutions that allow musicians and audio creators to prepare their tracks for distribution. Unlike traditional mastering studios, which require an in-person visit, online services enable you to submit your audio files from anywhere in the world. An audio engineer then processes these tracks through a series of steps, enhancing the sound quality and ensuring it meets professional standards. This process can include equalization, compression, and limiting, ultimately preparing the music for a variety of playback systems.

Benefits of Choosing Online Mastering Services

One of the primary advantages of using online mastering services is convenience. Musicians can work from the comfort of their own homes without the need to travel. Additionally, online services often provide more cost-effective solutions compared to brick-and-mortar studios. Many platforms offer transparent pricing structures, allowing artists to choose options based on their budget and needs. The speed of delivery is another significant benefit; most online services guarantee a quick turnaround time, sometimes within just a few days, allowing for faster release schedules.

Key Features to Look For

When selecting online mastering services, it’s crucial to consider several key features:

  • Audio Formats: Ensure the service accepts multiple formats like WAV, AIFF, or MP3 to cater to various requirements.
  • Feedback Mechanism: Look for platforms that allow you to provide feedback or revisions so you can achieve your desired sound.
  • Quality Control: Investigate the standards of the engineers and the technology used to ensure the final product meets high-quality benchmarks.
  • Experience and Reviews: Consider testimonials from previous users to gauge the effectiveness and professionalism of the service.
  • Flexibility: Check if the service can adapt to various genres and styles of music, as different tracks may require unique approaches.

The Mastering Process Explained

Steps in Online Mastering Services

The mastering process generally consists of several essential steps:

  1. Submission: Users upload their final mixes to the online platform in their preferred format.
  2. Evaluation: Mastering engineers listen to the track to understand its strengths and areas needing enhancement.
  3. Processing: Various techniques are applied, including EQ adjustments, compression, stereo widening, and limiting.
  4. Review: A first draft is generated, which is typically sent back to the artist for feedback.
  5. Finalization: Based on the artist’s input, the engineer makes necessary adjustments before delivering the final master.

Common Techniques Used in Mastering

Mastering engineers employ various techniques to elevate the quality of a track. Some common methods include:

  • Equalization (EQ): This technique is used to enhance or reduce specific frequencies, ensuring a balanced and polished sound.
  • Compression: Compression evens out the dynamics of the track, making quiet sounds louder and loud sounds quieter.
  • Limiting: Limiting boosts the overall volume of the track without causing distortion, preparing it for playback across different platforms.
  • Stereo Imaging: This technique ensures that the stereo field is utilized fully, enhancing the width and depth of the audio.

The Importance of Quality Control

Quality control in the mastering process is vital. This ensures that the final product is not only sonically consistent but also compliant with industry standards. Mastering engineers typically use high-end monitoring systems and environments to detect any flaws that might go unnoticed in a regular mixing setup. Regular revisions and feedback loops are also crucial in maintaining quality, allowing for adjustments based on the artist’s vision.

Selecting the Right Online Mastering Service

Factors to Consider When Choosing

Choosing the right online mastering service involves evaluating several factors:

  • Cost: Compare pricing models to find a service that aligns with your budget while still offering quality results.
  • Turnaround Time: Assess the delivery times, especially if you have tight deadlines for releases.
  • Trial Offers: Some services offer free trials or sample mastering, which can be an excellent way to evaluate their capabilities.
  • Customer Support: Reliable customer support can be crucial if you face any technical issues or require assistance during the process.

Comparing Services: What Matters Most?

When comparing various online mastering services, consider the following aspects:

  • Engineer Expertise: Look for services that highlight the experience of their mastering engineers and their specialties.
  • Technology: Assess the tools they use for mastering, from analog gear to digital plugins, as this affects the sound quality.
  • Client Portfolio: A robust portfolio of successful projects can indicate skill level and reliability.
  • Revision Policies: Understand how many rounds of revisions are included in the package, as this varies by service.

Testimonials and Experience of Engineers

Researching testimonials and the backgrounds of mastering engineers is crucial. Experienced engineers often have worked on a variety of genres and can bring valuable insights to enhancing your track. Look for feedback from past clients, as this will give you an idea of the quality and reactivity of the service. Solid testimonials often include specific examples of past work, showcasing the engineer’s capability to achieve desired results.

Integrating Mastering in Your Music Production

Preparing Your Tracks for Online Mastering Services

Properly preparing your tracks for mastering is critical for success. Here are tips to consider:

  • Leave Headroom: Allow a couple of dB of headroom on your tracks to avoid clipping during mastering.
  • Avoid Limiting: Remove any limiting on your final mix to prevent conflicts during the mastering process.
  • Clean Up Unused Sounds: Remove any unnecessary elements in your mix that could distract from the final sound.

Collaborating with Mastering Engineers

Collaboration with mastering engineers is essential. Communicate your vision clearly, providing them with references of tracks that match your desired sound. Be open to feedback; engineers often have insights that can elevate your project. Establishing good rapport with your mastering engineer can lead to a more satisfying outcome as they better understand your artistic goals.

Timing and Project Management

Effective project management will ensure your music production stays on schedule. Set realistic timelines for when you want to receive your mastered tracks, and build in extra time in case revisions are needed. Being mindful of the release dates can help in coordinating marketing efforts and promotional campaigns, ultimately leading to a smoother launch of your music.

FAQs About Online Mastering Services

How long does the mastering process take?

The mastering process can typically take anywhere from a few days to a week, depending on the service and project complexity.

What audio formats are accepted?

Most online mastering services accept formats like WAV or AIFF, ensuring high quality for your tracks.

Can I give feedback during mastering?

Yes, reputable mastering services usually allow for feedback and revisions to meet your desired sound.

Is online mastering as good as studio mastering?

Online mastering can be equally effective, often depending on the skill of the mastering engineer and their tools.

What should I consider before mastering my track?

Ensure your mix is polished and balanced; this will lead to better results during the mastering process.

Enhance your wellness journey with Ayurveda Consultation in a serene natural setting with herbal elements.

Achieving Balance Through Ayurveda Consultation: A Holistic Approach to Wellness

Understanding Ayurveda Consultation

In a world that often prioritizes quick fixes and symptom management, Ayurveda Consultation offers a unique perspective on health and wellness. Rooted in an ancient system of medicine, Ayurveda encourages individuals to look within for holistic healing strategies that align with their unique constitution and lifestyle. This introduction will delve into the essence of Ayurveda, the significance of consultation, and how this ancient practice can enhance your overall well-being.

What is Ayurveda?

Ayurveda, which translates to “the science of life” in Sanskrit, is an ancient system of medicine that originated in India more than 5,000 years ago. It encompasses a holistic approach to health, emphasizing the balance between the mind, body, and spirit. Instead of merely treating symptoms, Ayurveda aims to understand the root causes of health issues by evaluating each individual’s unique constitution (known as dosha).

At its core, Ayurveda is built upon the belief that each person is made up of five fundamental elements: earth, water, fire, air, and space. These elements combine to form three doshas—Vata (air and space), Pitta (fire and water), and Kapha (earth and water)—which influence our physical, mental, and emotional characteristics. Understanding one’s dosha is crucial in Ayurveda, as it informs personalized treatment plans that focus on restoring balance and harmony.

The Role of Ayurveda Consultation

The Ayurveda Consultation process involves a comprehensive assessment conducted by a qualified practitioner who evaluates an individual’s unique constitution through a variety of methods, including pulse diagnosis, tongue examination, and a detailed questionnaire about lifestyle and habits. This evaluation is essential to determine one’s dosha and identify any imbalances that may be contributing to health concerns.

Practitioners utilize extensive knowledge of herbs, nutrition, and lifestyle changes to create customized treatment plans. These plans can include dietary recommendations, herbal formulas, yoga, meditation, and detoxification methods. Through an Ayurveda Consultation, clients gain insights into their health that empower them to take charge of their well-being.

Benefits of Seeking Guidance

Engaging in Ayurveda Consultation offers numerous benefits, enhancing physical health and mental clarity. Here are some key advantages:

  • Holistic Understanding: Clients gain deeper insights into their lifestyle and the mind-body connection, promoting awareness of how various factors contribute to health.
  • Personalized Approach: Consultations yield tailored plans specific to each individual’s needs and dosha, resulting in more effective treatment outcomes.
  • Preventative Focus: Ayurveda emphasizes preventative healthcare, empowering individuals to make informed choices that can avert future health issues.
  • Increased Vitality: Many who undergo Ayurveda Consultation report increased energy levels, improved digestion, and enhanced overall wellness.

Key Principles of Ayurveda Consultation

Doshas Explained

As mentioned, doshas are the fundamental forces that govern our physiological and psychological functions. Understanding the three doshas—Vata, Pitta, and Kapha—is crucial for effective Ayurveda Consultation. Each person has a unique dosha composition, and identifying it can help guide dietary and lifestyle choices.

  • Vata: Characterized by qualities like dryness and coldness, individuals with a predominant Vata dosha tend to be creative and energetic but can experience anxiety and irregularity if imbalanced.
  • Pitta: Tied to fire and heat, Pitta types are often ambitious and focused but can face issues like anger and inflammation when out of balance.
  • Kapha: With nurturing, steady attributes, those with a dominant Kapha dosha can be calm and supportive but may struggle with lethargy and attachment when imbalanced.

The Importance of Balance

Achieving a balance among the doshas is fundamental in Ayurveda. Each dosha has both positive and negative qualities, and imbalances can lead to physical ailments and emotional challenges. An Ayurveda Consultation focuses on identifying these imbalances and suggesting adjustments to diet, routines, and mindsets that can help restore equilibrium.

Practitioners emphasize the importance of seasonal and situational factors in maintaining balance. For example, a person with a Vata dosha may require warm, oily foods during winter months to counteract the cold and dry qualities of the season. By understanding the cyclic nature of life, individuals can adapt their lifestyle proactively.

Personalized Treatment Plans

One of the hallmarks of Ayurveda is its commitment to personalized treatment. Unlike conventional medicine, which often advocates a one-size-fits-all solution, Ayurveda recognizes that each individual’s journey to health is unique. After a thorough consultation, practitioners craft tailored treatment plans that may include:

  • Dietary Adjustments: Tailoring food choices to balance doshas, including specific spices and food types.
  • Herbal Remedies: Curating herbal formulas to alleviate specific symptoms and restore balance.
  • Lifestyle Changes: Implementing principles such as daily routines (Dinacharya) that align with one’s dosha to enhance overall well-being.
  • Meditation and Yoga: Suggesting practices aligned with the individual’s needs to promote physical and mental well-being.

Choosing the Right Practitioner for Ayurveda Consultation

Qualifications to Look For

Selecting the right Ayurveda practitioner is a critical step toward effective consultation. Look for the following qualifications:

  • Accredited Training: Ensure the practitioner has formal training from recognized Ayurveda institutions or organizations.
  • Experience: Seek out practitioners with years of experience, as they bring a wealth of knowledge and practical expertise.
  • Personal Approach: A good practitioner should demonstrate empathy and a willingness to understand your unique needs and concerns.

Questions to Ask

Before beginning an Ayurveda Consultation, consider the following questions to gauge a practitioner’s suitability:

  • What is your approach to diagnosis and treatment?
  • Can you explain how you develop personalized treatment plans?
  • What types of modalities do you incorporate into your consultations?
  • Do you offer follow-up support?

Evaluating Compatibility

Compatibility with your practitioner is vital, as effective communication and trust foster a successful healing relationship. Assess whether the practitioner’s philosophy aligns with your beliefs and values, and consider scheduling a preliminary consultation to gauge comfort levels and approach.

Common Challenges in Ayurveda Consultation

Misconceptions about Ayurveda

Despite its ancient roots, Ayurveda faces modern skepticism, often fueled by misconceptions. One common misunderstanding is that Ayurveda is merely a set of herbal remedies, neglecting its holistic nature. It’s essential for practitioners to educate potential clients about Ayurveda’s wide-ranging benefits, beyond just herbal solutions.

Integrating Ayurveda into Modern Life

Integrating Ayurveda into one’s daily routine can present challenges due to modern lifestyles characterized by fast food, quick fixes, and hectic schedules. However, small adjustments such as mindful eating, aligning daily routines with nature, and mindfulness practices can help bridge the gap between ancient wisdom and contemporary life.

Overcoming Skepticism

Overcoming skepticism toward Ayurveda may require some time and education. Engaging new clients through evidence-based practices, sharing success stories, and fostering open dialogue can help dismantle doubts surrounding Ayurveda’s efficacy.

Maximizing the Benefits of Ayurveda Consultation

Follow-Up and Continuous Care

Maximizing the benefits of an Ayurveda Consultation involves consistent follow-up and continuous care. Regular check-ins with your practitioner enable adjustments to your treatment plan based on progress, changes in lifestyle, or new challenges that may arise. This continuous engagement ensures sustained success and a deeper understanding of one’s health journey.

Complementary Practices

Incorporating complementary practices such as yoga, meditation, and pranayama (breath control) can deepen the benefits gained from Ayurveda Consultation. These practices enhance mental clarity, emotional stability, and physical health, aligning well with the Ayurvedic philosophy of living in harmony with oneself and the environment.

Measuring Your Progress

Tracking progress in Ayurveda involves more than just physical changes; it also includes mental, emotional, and spiritual well-being. Keeping a journal to log symptoms, emotional changes, energy levels, and dietary habits can help identify positive trends and areas needing attention. Working with your practitioner to assess these changes allows for fine-tuning of the holistic approach.

FAQs

1. What is an Ayurveda Consultation?

An Ayurveda Consultation is a comprehensive evaluation conducted by a qualified practitioner to assess an individual’s dosha, lifestyle, and health concerns, leading to personalized treatment plans for holistic wellness.

2. How long does an Ayurveda Consultation typically last?

Ayurveda Consultations generally last between one to two hours, allowing sufficient time for an in-depth assessment and discussion of treatment options.

3. Can anyone benefit from Ayurveda Consultation?

Yes! Individuals of all ages and health backgrounds can benefit from Ayurveda Consultation as it offers personalized approaches to enhance overall health and well-being.

4. Is Ayurveda Consultation safe?

When conducted by qualified practitioners, Ayurveda Consultation is safe. However, it’s essential to discuss existing health conditions and medications with your practitioner.

5. How often should I have an Ayurveda Consultation?

The frequency of Ayurveda Consultations depends on individual health goals and conditions. Many practitioners recommend follow-ups every 4-6 weeks for optimal progress tracking.